Almost every database platform allows fields to be indexed, with FileMaker being no exception. Indexing fields allows for faster search and retrieval within the database, particularly when it's hosted (rather than local) and regularly used by multiple people. Periodically, indexes also need to be rebuilt. As they grow over time and usage, they can become fragmented or corrupted. Record creation and deletion impacts indexes. To recover from these and prevent additional disruption, the indexed fields should be rebuilt. But how is that accomplished?
Step One: Identifying and Locating Indexed Fields
To begin, you’ll need to know which fields are indexed and which will need to be rebuilt.
Open the Tools menu
Click on Database Design Report…
In the dialog box that appears, select XML output
Click Create
Open FMPerception
Open your DDR within FMPerception
Look at the Fields (flat) option
This is a list of ALL fields in the database, so sort the results based on “Base Table”.
Click File > Export Results to CSV…
Open the CSV file -- you can remove unnecessary fields if you’d like, but make sure to keep the Name, Base Table, Index, and Validation fields.
A sample .CSV spreadsheet opened in Numbers on a Mac.
There are three columns you’ll want to pay attention to:
Name: This it the name of the field
Base Table: This is where in the database the field is located
Index: This tells you if the field has been indexed, and what kind if so
Step Two: Removing Indexing
Open your database
Open the database manager
Command + Shift + D, or
File > Manage > Database
Go to the Fields tab
In the Options / Comments column, look for Indexed listed to indicate an indexed field
Select a field that’s indexed
With the indexed field selected, click the Options... button
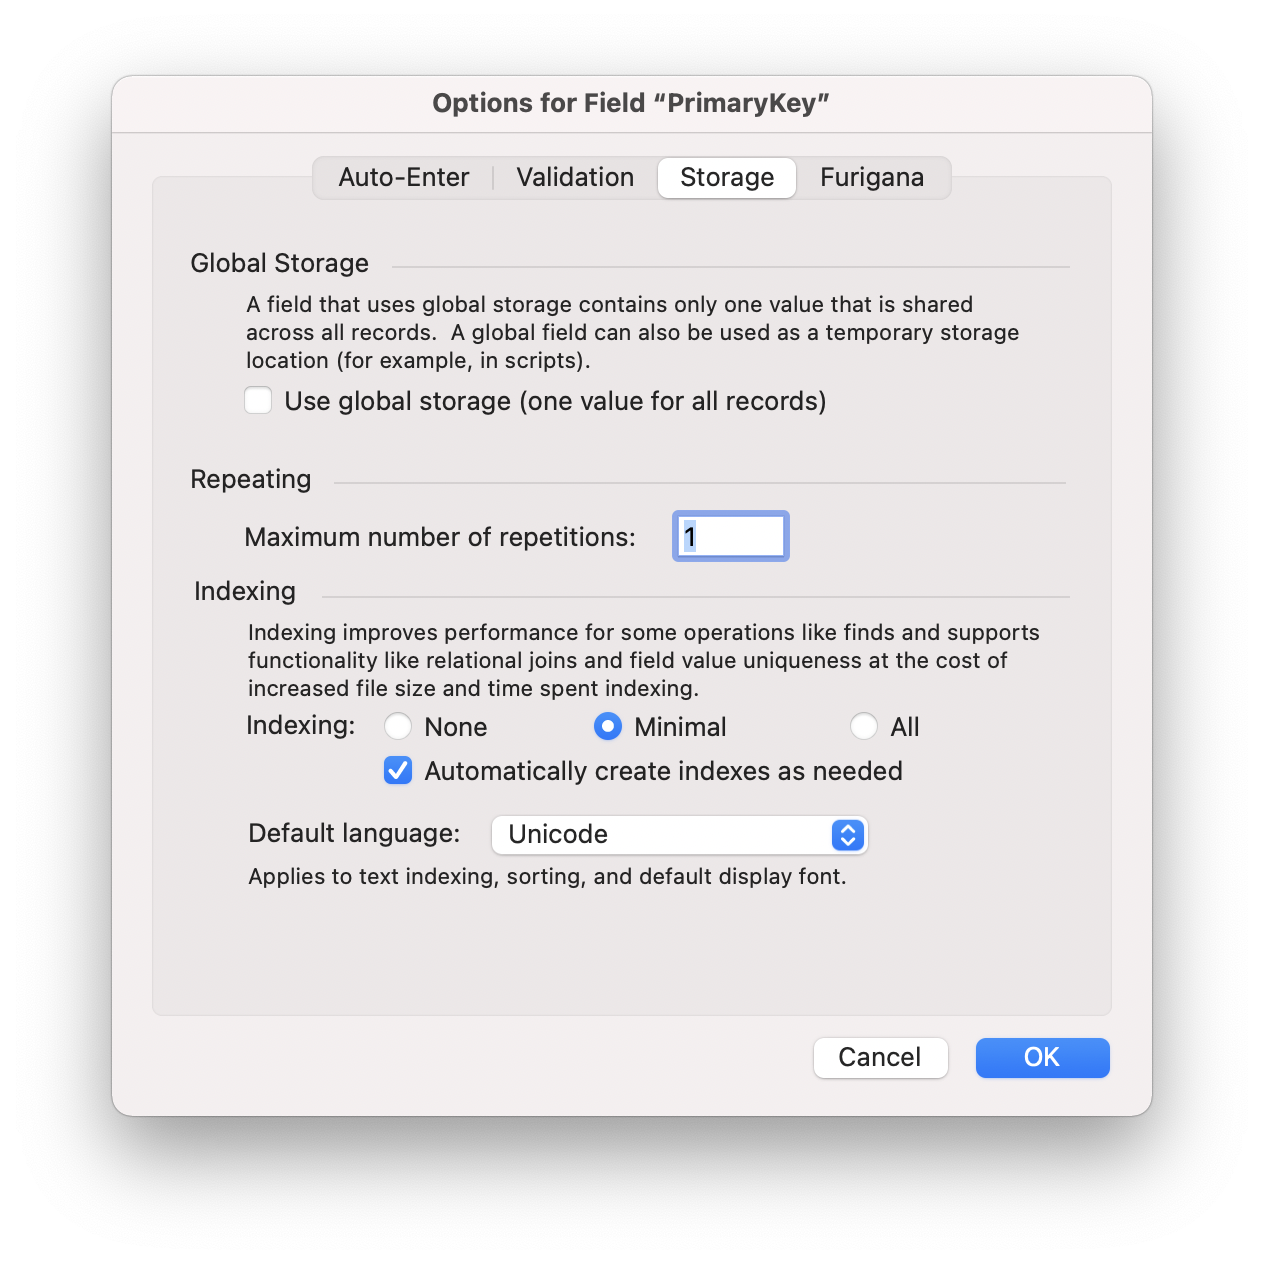
Go to the Storage tab
Under the Indexing header, identify if the field has Minimal or All indexing
Database manager on the Fields tab with a field that is indexed selected.
This is the open Options menu for a field, on the storage tab. This field has Minimal indexing.
Step Three: Adding Indexing
Change the Indexing radio button to None
Uncheck the Automatically create indexes as needed checkbox
Click OK to exit the Options menu and return to the database manager
Confirm on the database manager that the field is no longer indexed
Repeat for all other index fields
Click OK to exit the database manager and return to your layout (see below for validation error message)
Reopen the database manager
Go to the Fields tab
Select a field that needs to be indexed
Click the Options... button
Go to the Storage tab
Change the Indexing radio button to Minimal or All as needed
Check the Automatically create indexes as needed checkbox (if needed)
Click OK to exit the Options menu and return to the database manager
Confirm on the database manager that the field is now again indexed
Click OK to exit the database manager and return to your layout
This is the open Options menu for a field, on the storage tab. This field has indexing turned off.
Troubleshooting: Validation Option Error Message
This validation error occurs when a field has had its indexing changed to none, but it has validation requirements that require it to be indexed.
A sample of what this validation error message looks like.
Click OK on the error message
Return the indexing options to that the field originally had
Go to the Validation tab
Under the Require header, identify if the Unique value checkbox is selected
Uncheck it
Go to the Storage tab
Proceed as instructed above to continue deindex the field
When you reindex the field, reselect the Unique value checkbox in the Validation tab
The validation tab with the unique value checkbox selected
PK Information is a FileMaker-certified development agency serving the Tampa Bay, Miami Lakes, and Knoxville regions. We believe software should work the way you do, with business priorities first and technology second.
LEARN MORE
Would you like to learn more about rebuilding index fields in FileMaker and the benefits from doing so? We’d love to discuss the possibilities with you! Please complete this form and we’ll connect shortly.


